Friday, December 31, 2010

2010 in Review


Another year has come and gone. While I was contemplating this past year, at first I thought I really didn’t do much or accomplish much. That really isn’t true. Now don’t get me wrong everyone wishes they have done more in the year. But I think very few of us look back and see what we got accomplished.

I got to go to the PA Farm Show and get a lot of fleeces, I raised chicks which is a whole story in itself, fun and rewarding non the less. Did well with selling produce this year, which took up most of my time over the growing season. Revamped my Inkle loom and was doing self study on inkle weaving. Learned a new weaving technique, I’m referring to Bobbin Lace (which is a lot of fun I may add). Got too meet new people and make new friends.

So no I didn’t get everything done this year I had hoped. But I got more done than I originally thought. The New Year is less then fourteen hours away, so perhaps next year i will get even more done. Time will tell, see you next year.

Wednesday, December 15, 2010

Clerical Stole


Over the summer a friend of mine asked me if I would make a Stole for her. She would like to give it as a Christmas gift, I had no problem doing that. At the time she asked me I wasn’t doing any weaving because of time restrictions. I was finally able to make the stole for her and it is on the to her as I’m typing this post.

The one and only request she had was that it be colorful, ok but how do I do that for a stole. So I got a brilliant idea to incorporate all the liturgical colors of the year into the stole. I originally started out to weave the stole in shadow weave, my minds eye said that would have been beautiful. And it may have been with not so many colors, I just couldn’t get a color combination I liked so I scraped that idea.

Then I came up with the idea of doing overshot, I was going to do the whole stole with a pattern. Then I decided since I have eight shafts why didn’t I do this in steed. PC150009  I know what your saying that you can’t see the pattern, this is why we sample so we can see if our idea works before we make the full project. The only other request was that it be 6” wide so I had to make a sample to get the correct shrinkage percentages as well. First looking from left to right the colors start out with blue and pink for advent which is when the christen new year starts. To be specific it starts on the first Sunday of Advent, then white for the Christmas season, green for the time between Christmas and Lent, purple and pink for lent, black for Good Friday, White for the Easter season, red for Pentecost and to finish out the year green for Ordinary time. This way the stole can be worn any time of the year and will have the correct color for the season we are in. The patterns are two different ones (this is where the eight shafts come in) the one on the right and the one  on the left are both the same and are on shafts one through four. The center motif is on shafts five through eight.

I had done a piece about a year ago using the same pattern weft as I did with this sample. With the piece I did previous the pattern stood out quit nicely. Here not so much then I realized that on this piece I’m using ecru for the tabby weft, PC150006which is muting the colors and there for muting the pattern. So I had to pick a new pattern weft, after doing the math to get the shrinkage percentages I found out that the piece is to wide so I had to pick new patterns for the left and right sides. This is what I came up with.  


You can see from the picture above the pattern is only on one side. That was done on purpose, In the beginning I was going to do an over all pattern then I thought to do something like this. PC150005At the fringe you have the corner motifs then the center, a space the center motif again, space and the reverse of the bottom and I would continue with the center motif as the start of the repeat. Instead of doing that all over I decided to do that on one side and not repeat it. Which I like the results of this much better then my original idea. It’s simply elegant in a reverent sort of way. 

The back I had some fun with, to make life easier I decided to weave the angels in to the pieces. let me show you what I mean.PC110002  

That way all I had to do was serge the ends and sew the two piece together. That worked out to be one of my best ideas. I also had another idea to place a motif in the back, you’ll se that in the picture in a moment. After weaving and washing I foundPC150007  it to be a bit to long. I myself am over six feet tall this stole went down to my ankles. So I had to reduce it’s length by six inches, which means instead of the stole being 146” long it measures 140” long. That put’s it half way down my knee, which is the correct length for me. Some people like them a little longer so there shouldn't  be a problem with the length. If you look over on the left shoulder you will see a motif in its center. when it is worn properly that motif will be on the back. I thought that would be a neat thing to do since you all ways see the decoration on the front and never the back. Yet you do see the back of the minister more then you realize, so here is some thing to look at on the stole.

I do hope the recipient of this stole enjoys it and where's it many, many, many times.

Sunday, November 28, 2010

Bobbin Lace Continued


While I was at the bobbin lace class, I was given the information and pattern for the second lesson.PB230018-2 Which was a lace trim also, this one is wider and has a half stitch design with a ground area to it. I found this one to be a little more difficult to create not so much because of the different parts, but more the written directions. the directions where a little confusing for me but I got through it and got a nice looking piece of lace from it.

This piece has a half stitch design on the right side with a ground stitch on the left. On the far left is the sewing edge, that isPB230018-1 what it sounds like when you wish to sew it onto a garment or use it for trim, the outer edge has been reinforced to give the lace strength. This also gives you little wholes in which to sew through when you attach  it to your piece. From the picture on the left you can see the half stitch are with the ground to its left. If your reading this and not understanding what I’m saying, I plan on giving a more in depth description on the different stitches and have pictures to show you what I’m talking about.

If you haven’t guessed it I’m really enjoying making lace and will continue to explore this type of weaving and share my results with you all. Check back in a few days I pan on blogging some more about it.

P.S. I hope everyone had a fabulous Thanksgiving.

Sunday, November 7, 2010

Bobbin Lace

About a month ago I told you all that I went to a fiber festival. While I was there I saw a demonstration of bobbin lace. I also hinted that I may take a class one day and that day has arrived because I just got home from a bobbin lace class. The class was put together by The Metropolitan Chapter IOL of North New Jersey. They had four class going on today from basic to more advanced and even Princess Lace. I took the basic class since I had no clue what I was doing.

In this class you learned the basic stitches that form bobbin lace. Once you learn them you are set to go with trims, book marks and such.PB070012 The five stitches are linen, half, whole, linen with a twist edge and half with whole stitch edge. I apologize for the picture this the best I can do, I will try to get them clearer in the future. So for the morning part of the class we made these samples each square is a different stitch. We all got the hang of it pretty quickly so when it became lunch, we where ready for the next step.

The next step was to make a lace trim which is really pretty and simple to do. PB070015The lace is made up of whole stitches and when you are done you get a thin piece of lace for trim. Everyone said that this lace looked like lace trim they used for baby outfits. Again I apologize for the pic. For anyone that does not know bobbin lace is a woven structure. The linen stitch is an under over of warp and weft threads. Instead of you using a loom, you use the bobbins to create the woven fabric.

Our instructor was Lynda Berber who was very nice and helpful.PB070011 She was telling us how she was teaching a children's class yesterday and how they all enjoyed it.

There where only three of us in the beginning class today but we had fun and good food too.PB070010

Micheline Hodge was the one who suggested I take the class. She was the one doing the demonstrating at the fiber festival, she had also told me about a woman who tat’s was going to be there if I needed any help with my tatting. This woman's name is Kathy Kirchner and happens to be a part of one of the Yahoo groups that I belong to and while we were talking I told her that I brought my tatting bag with me. She then asks me if this was the bag that was on the Yahoo group and yes it was. How cool is that to meet some like that pretty cool if you ask me. Kathy also sells lace making supplies so if you have any need just click the highlighted words above to check out her sight.

All in all it was a good day and know it is time to have dinner.

Wednesday, October 27, 2010

Second try with Woad

Last year I tried my hand at growing some woad and only got one plant. From that I dyed some yarn with it, that yarn came out a light blue.

This year I planted more woad and was successful with it and got five strong plants. With that I also planted Chinese woad which did not grow not as large as the English woad put still useable.

So I thought that it would be fun to do a caparison with last years and this years to see the differences. To recap last year I sun dyed and only used the leaves from one plant. This year I used the leaves from five plants and a small amount of Chinese woad. Lets see what the differences may be.

I wasn’t able to sun dye this year it was just to cloudy and with it becoming later in the season. I didn’t want to risk getting a freeze before I was able to make the dye. So this year I made the dye inside with about a hundred twenty degree water or so and left it set for a couple of hours.

I never figured out the weight of woad I was using I just filled a quart jar tight with leaves. to the point water wasn’t getting in there. If I had to give a guess I would say there was close to a pound of fresh leaves. Do understand that I am only taking a guess at that.

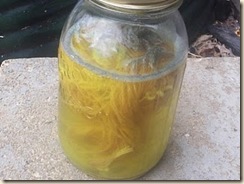
I had to use a gallon jar this year since there waPA250006s just so much more dye to the point of having two thirds of a gallon this year, compared to one quart of dye last year. This years dye in the first stage was a very dark burgundy. That it looked black in the jar I was using to measure with. Last year it was a burgundy color that was translucent, not that case this year.


I used the gallon jar to add the are into the dye to change it to blue indigo or I guess in this case blue woad. I transferred PA250007it back to the quart jar for a picture. The interesting thing is that both this year and last year after adding the air into, it turned it to a very dark green. so dark it looked black. With a foamy bear head from the small amount of detergent which helps the woad to penetrate the wool. ( If you look at both pictures above you maybe able to see the above right is burgundy and the lower left is a blue green color, both very dark but still a definite color difference.)


Last year I had Spectralite which I still have but since it is more then a year old, it most likely won’t work since the shelf life is only one year. P6230016So to play it safe I got some Rit color remover to remove the oxygen from the vat(the active ingredient in this is Spectralite).  Last years dye turned a neon yellow very bright and almost blinding. I will say that I thought I did something wrong, since I thought it way going to be a green color not yellow. So of course I’m trying to figure out what I did wrong. Which of course was nothing.


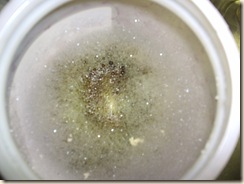
This years took a little longer to turn back into white woad but it worked and again it turned a yellow so I guess that's the color its supposed to be.PA250008 Sorry for the poor picture of this point, the jar isn’t clear and wasn’t showing up properly. So I decided to take a pick from top down manly bubbles but a small area of the dye itself.


P6230017

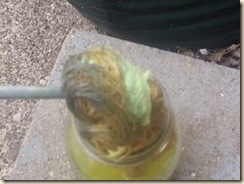
Now the fun was going to begin because with all that woad I should have a good dark color,  or at least thats my hope. Last year the yarn came out a neon yellow, but turned green then to blue. With this picture you can even see a small amount of blue at the right. The color didn’t fully develop until it was out for a minute or two. 


PA250009

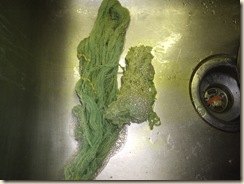
This year the yarn came out not so neon but defiantly yellow. Again it took a minute or two to become developed. There's the yellow to green, it’s hard to see any of the blue in the sing but it is there starting to turn.


P6230019The last comparison is the final color last year a very pretty light blue, not an ugly color at all, just light. I was fine with that, I would have like to have a darker color but at least I got blue. The two skeins to the left are cotton and linen. The light blue on the right is wool which is what I dyed this year. So did I get a darker color this year or was I disappointed. For you to find out just look below and see for your self.


 PA250010

Yes I did get a very nice medium blue, which is very pretty. If you would like to read the inn's and outs of how I did this last year just lookup woad in last years list and you can read all about it.


Tuesday, October 5, 2010

Fiber Fest

This past Friday Ed and I went to the North Jersey Fiber Arts Festival in Ridgewood, NJ. It is a small fiber fest but just because it is small doesn't mean that it isn’t good. There where weavers, spinners, knitters, tatters and lace makers. Demonstrations on felt making, crochet, bobbin lace, knitting, weaving, spinning and quilt making.

While I was there I got to spin some Lama which I never got to do before. What was even coolerChuckSpin was I got to use a double treadle wheel for the first time which was so fun, and I must say I think easier to use and control. But it could have been the euphoric  state I was in trying it out. The Lama to my surprise was almost as soft as Alpaca, very easy to spin, also being a little slippery like Alpaca so it requires more twist. At least the sample that I was working on was that way.

While I was walking around I stopped of at the lace guilds table. Micheline Hodge was demonstrating bobbin lace. I must confess I have always been intrigued about bobbin lace. So it was a natural attraction and she made it look so easy. We will have to see, maybe I will take a class one of these days.

While I was there I did pick up some things for myself. Three new books, The Yarn Book by Penny Walsh, The Spinners Companion by Bobbie Irwin and Handspinner’s Handbook by Bette Hochberg. I just finished the Yarn Book, which I liked a lot there is a lot of history in the book, with a section on different yarns and evenPA040001 different fabrics with definitions. I haven’t read the other to books yet but I’m sure I will like them as well.

I also picked up a couple of new spindles. I was in the market for a new drop spindle, then I found this supported spindle. PA040003 I have to practice more with the supported spindle until I get the hang of it. The drop spindle works like a dream.

I had a really good time Friday before I headed off to work, That is one of the hard things living in the area that I there aren't that any fiber related activities. You are forced to drive out of the area to attend one. Maybe one day there will be one in this area.

Inkle Loom Upgrade

About a year or so ago I made an inkle loom from PVC pipe. The pattern came from Handwoven magazine, if you look through the blog history you will find a posting of it.

I made the loom to the specifications of the magazine article. It works just as is, but I wasn’t happy with how the warp lade over the castle bar, both heddle and open warp strands.

So to fix my little problem I deP8100001cided to create a second  shorter castle, so the loom now has a double castle. What this does is it creates a cross of warp strands, which helps with the tension. This also gives the open warp threads the ability to move more freely.

The way you warp the loom now is starting from the fabric beam over the first castle bar, under the second castle bar, around the back beam to the front beam, underP8100002 the first castle bar, over the second castle bar, to the back beam, then to the front bar and you continue this way until you are done warping.

The one disadvantage is you need to remove the vertical side pieces of the castle so you are able to do the cross. The rest of the setup is the same and the weaving is the same. This little experiment worked out very well for me and hopefully or may be help someone else.